| |
Step
1 - cleaning up linework
(in painter 7)
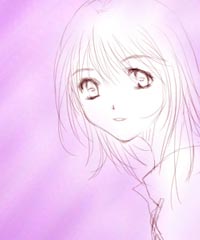
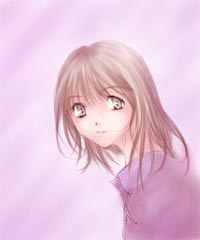
First of all, I need to have a clean sketch. I do it directly in
painter using 2B pencil  I suggest using a scanner if it is avaialble, because it saves a
lot of time. Erase all the unwanted lines, and make sure it is clean
enough for coloring. Now I have to determine what will be the main
color of the picture. My choice is purple,
so i add a purple soft light layer on top of my original lines.
I suggest using a scanner if it is avaialble, because it saves a
lot of time. Erase all the unwanted lines, and make sure it is clean
enough for coloring. Now I have to determine what will be the main
color of the picture. My choice is purple,
so i add a purple soft light layer on top of my original lines. |
 |
Step
2 - rough background coloring
(in painter 7)
Now I create a new multiply layer for the background.
By creating a separate layer, it will be easier if I want to make
any color adjustments later on.
I spray the background with my chosen color: purple, and I use digital
airbrush.  It is just a rough coloring, and so there is no need to color within
the exact border. You can see I have cross over the lines a little
bit.
It is just a rough coloring, and so there is no need to color within
the exact border. You can see I have cross over the lines a little
bit. |
 |
Step
3 - basic coloring
(in painter 7)
I create several individual multiply layers for
skin, hair and clothing. Color like how you do with your background
layer. Again, I use digital airbrush.
Oops.. I think the background is too bright, so I lower the the
saturation value of the background layer.
Effect -> Tonal Control -> Adjust Colors |
 |
Step
4 - first layer of color
(in painter 7)
Change the brush size and opacity options to pressure
if your tablet is pressure sensitive.
Brush Controls -> Expression
Try to use more than one type of color. (ex.if your base color is
red, don't just choose light red or dark red for further coloring.
Try to pick a red with some orange color) Choosing the same color
will make the picture look dull. Again, digital airbrush.
It is very important to finish the first layer of color for the
entire picture before further coloring. (ex. don't rush to highlight
the hair before finishing the first contrast of clothing part) |
 |
Step
5 - second layer of color
(in painter 7)
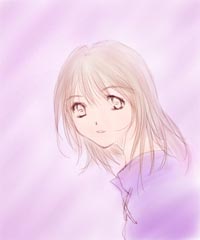
Now I add the second layer of color. digital airbrush
Try to make it detailed here, because the picture is close to finishing
stage. ^^
It's time to do some color adjustments if necessary. I think it's
not needed, so the rough coloring is done by this point. |
 |
Step
6 - more on background
(in painter 7)
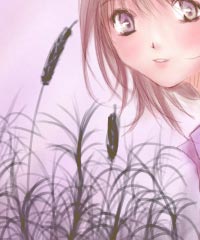
Background is also a very important element for the picture. I try
to come up with one which suit the theme. Here I use smooth
ink pen.  Although I am not sure what plant it is, it looks ok for me.
Now it is the last chance to add more details on the picture, so
I try to add as many as possible. |
 |
Step
7 - lighting color
(in painter 7)
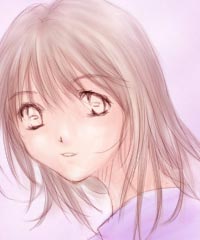
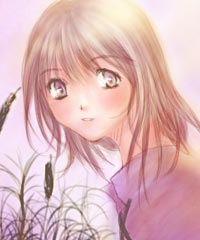
Here comes the highlight part. I decide the light is coming from
top right of the picture, and the time is dusk.
I use two layers to do this: one multiply layer,
and one overlay layer. I choose orange
to be the color, and spray according to the direction of light
with digital airbrush.
I didn't forget to highlight the plant as well. |
 |
Step
8 - finishing up
(in photoshop 7)
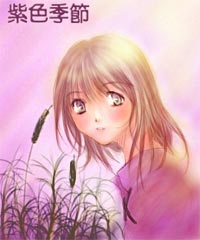
The picture is already done by the last step and now I just need
to add some effects. I can do whatever I like as long as I don't
spoil the theme. Somehow my painter doesn't read chinese, so I decide
to take the whole piece to photoshop. I add the chinese text (purple
season) and a little bit of noise.
Filter -> Noise -> Add Noise
Now the picture is DONE!!!
<< Click to see the finished piece. |